The primer bulb is one of the most important parts of a lawn mower. Without it, it can be almost impossible to start the engine.

It functions by sending fuel into the carburetor bowl that would otherwise have to be sent there over many pulls of the starter (push mowers don’t have fuel pumps, this is why the primer bulb is so important).
One of the most common problems with a primer bulb replacement is purchasing the wrong one when the old one gets a hole. Make sure to pick up the exact one that is called for in the manual that came with your mower.
Repair difficulty = Easy
How a Primer Bulb Works
- The primer is pressed in.
- When released, a vacuum is created as the primer bulb “snaps back”.
- This vacuum sends fuel into the carburetor, making the engine ready to fire.
Vented vs Non-Vented Primer Bulb

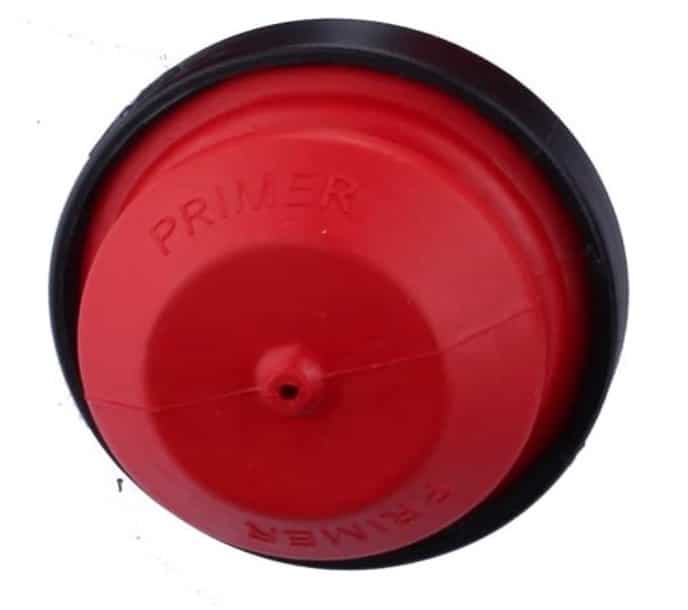
- Vented– If the primer bulb has a hole, it affects the air/fuel mixture going into the engine and can make the mower both difficult to start and run poorly. That being said, some primer bulbs do have a hole that is supposed to be there. This is known as a vented primer bulb. The hole would be tiny and centered. It would be more accurate to call a hole in a primer bulb that shouldn’t be there a crack.
- Non Vented– Non vented simply means that the small hole in the center of the primer bulb is not there for your model.
Make sure when replacing a primer bulb that you look up the exact bulb that your mower requires. Even if it fits, and you replace a vented bulb with a non vented (or vice versa) you’ll end up messing with the air/fuel mixture entering the engine since that tiny hole can let in a tiny amount of air.
Primer Bulb Hole Symptoms
When the primer bulb has a hole in it, it changes the characteristics of how the engine runs. This is because a vacuum leak is created, much like a normal car or truck would have.
If you can get the mower started, you can wait for it to warm up running poorly. Then, shut it down. With a small standard screwdriver, try and close the hole in the bulb by pulling the parts of the bulb so that they are flush with one another.
Now restart it without pressing the primer bulb in. It should fire right up and run better since you’ve effectively closed most of the hole. Clearly you should replace the bulb, but this trick can let you finish mowing for the day.
Replacing the Primer Bulb
Replacing the primer bulb is a relatively easy task. Here’s a great video that goes over how to replace a few different styles of primer bulb.
How Do You Know if a Primer Bulb is Bad?
The easiest way to tell if a primer bulb is bad is by doing a visual inspection. If it looks to be dry rotted, has a hole, or is cracked it is probably bad.
Another way to tell if it is bad even if it looks ok is to push it in and see if it is easier to push in than it used to be. The “snap back” from pressing it in takes a little bit of time (particularly if it does not have the hole in the middle). If it snaps straight back, there may be an air leak in or around the primer bulb.