DIY Grass Seed Mats
Grass seed mats, often regarded as a cost-effective alternative to sod, are essentially biodegradable fabrics that house a mix of grass seed, mulch, and fertilizer. Here’s how they can be a game-changer for your lawn:
- Easy Application: You place the mat over your prepared soil, which makes for a neater sowing process without the usual scatter of seeds that wind or birds might disturb.
- Erosion Control: The mat helps to keep the seeds in place, which is particularly useful on slopes or areas prone to washing away during rainfall.
- Even Growth: With these mats, seeds are distributed evenly, preventing over or under-seeding, promoting a more uniform lawn.
- Protection: The fabric protects the seeds from being eaten by birds and from harsh sunlight which can dry out seeds before they take root.


When considering a DIY seed mat, you’re also embracing a personalized approach. Here’s a brief outline of the process:
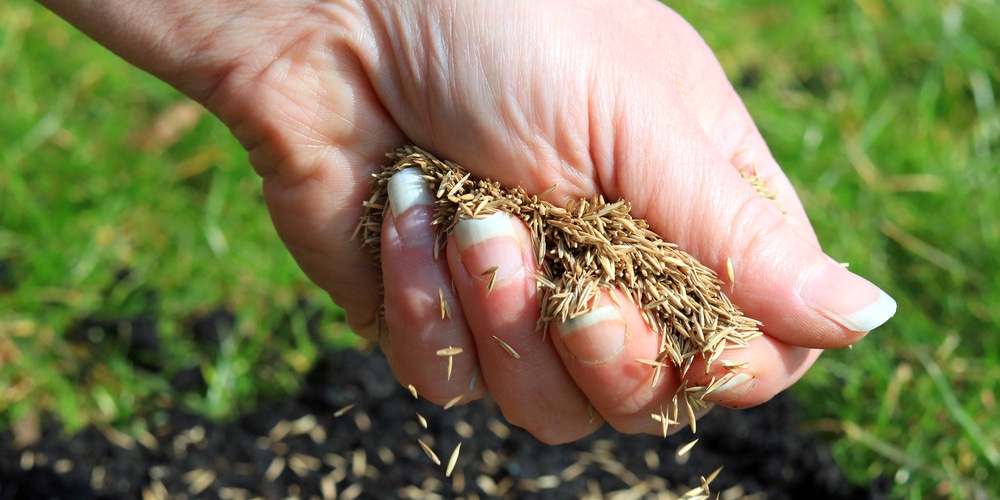
- Choose Your Seed: Pick the right type of grass that suits your climate and soil.
- Craft the Mat: Using a biodegradable material, such as burlap, evenly distribute and embed the seeds.
- Place and Secure: Lay the mat onto your prepared area and secure it in place with garden staples.
- Water and Care: Keep the mat moist to encourage germination and growth until the seeds have firmly taken root.
Materials and Tools for Creating Your Own Seed Mats
When embarking on the project of creating DIY grass seed mats, you’ll require specific materials and tools to ensure a successful and budget-friendly sod alternative. Here is what you’ll need to gather:
Selection of Grass Seeds
- Choice of Seeds: Depending on your climate and the lawn quality you desire, options may include but are not limited to:
- Kentucky Bluegrass for cold climates
- Bermuda Grass for warm climates
- Seed Quality: High-germination rate seeds ensure better success for your seed mats.
Biodegradable Materials
- Biodegradable Paper: Such as:
- Newspaper, free of colored inks
- Paper towels or napkins
- Base Fabric: Natural fibers like cotton can also be utilized as the seeding substrate.
Binding Agents
- Natural Glue Mixture:
- A paste made of flour and water, with a consistency thick enough to hold the seeds in place without dripping.
Required Tools
- Measuring Tools:
- Ruler or measuring tape for precision in seed spacing
- Application Tools:
- Toothpick or small paintbrush for applying glue
- Tweezers for seed placement
- Cutting Tools:
- Scissors or a blade for cutting the mat to the desired size
Step-by-Step Guide to Making Grass Seed Mats
Grass seed mats are an economical and efficient way to establish a lush lawn. By following these step-by-step instructions, you can create your own seed mats to enhance germination and reduce the time it takes for seedlings to establish.
Preparing the Base Material
- Select Your Base: Begin with biodegradable material like burlap or paper towel as your base. This supports sustainability and ensures the mat will decompose naturally.
- Cut to Size: Measure and cut the base material to the desired size, typically matching the sections of lawn you wish to cover.
Mixing Seed with Binding Agent
- Seed Choice: Choose a seed mix that is suitable for the climate and the specific conditions of your lawn area, much like the recommendations found in this grass seed guide.
- Create Binder: Mix a natural binder, such as flour and water paste, to secure the seeds onto your base. Ratio should be one part flour to two parts water.
Application Technique
- Mark Seed Spots: On the base material, use a pencil to lightly mark where seeds will be placed, guided by the seed rate instructions.
- Apply Binder and Seeds: Dab the binder onto the marked spots and then place seeds on top, pressing lightly to ensure contact.
Drying and Storage Process
- Dry Thoroughly: Leave your seed mat to air dry in a flat and well-ventilated area to prevent mildew and ensure seeds are firmly attached.
- Store Safely: Once dry, roll the seed mats gently and store in a cool, dry place until ready for use in the garden.
Installation Process of DIY Grass Seed Mats
Creating your own grass seed mats is a cost-effective way to achieve a lush lawn without the expense of sod. By following these detailed instructions, you can ensure proper installation and growth.
Site Preparation
- Clear Debris: Begin by removing all weeds, stones, and debris from the area.
- Soil Adjustment: If necessary, adjust your soil’s pH to be slightly acidic, with a pH of 6 to 7.5, which is optimal for grass growth.
- Level Ground: Rake the soil to create a level surface, with a gentle slope away from buildings to prevent waterlogging.
Laying the Seed Mats
- Measure Area: Determine the size of your lawn to estimate the amount of seed mat needed.
- Cut Mats to Size: If your biodegradable grass seed mat is too large, cut it down to fit the area.
- Secure the Mats: Lay out the mats flat on the soil and anchor the edges with pegs or staples to prevent them from moving.
Watering Regimen
- First Watering: Thoroughly soak your mats with water initially to kickstart the growing process.
- Regular Moisture: Keep the seed mats consistently moist, especially during the first three weeks, without causing waterlogging.
Maintenance Tips
- Traffic: Minimize foot traffic on the newly laid mats to allow the seeds uninterrupted growth.
- Weeding: Remove weeds by hand to avoid disturbing the developing roots of your grass.
- Mowing: Delay the first mow until the grass reaches 3 inches in height to ensure a strong foundation.
Benefits and Limitations
Before diving into DIY grass seed mats, it’s essential for you to consider not just the initial cost savings but also their environmental impact and how they fare in terms of growth and coverage compared to traditional sod.
Cost Comparison with Sod
- Grass seed mats are generally more affordable than sod. Here are the specifics:
- The cost of seeding a lawn ranges from $0.10 to $0.20 per square foot.
- Sod can cost approximately $0.50 per square foot, making seed mats a budget-friendly option.
Environmental Impact
- Eco-friendliness of DIY seed mats:
- These mats are often made from biodegradable materials, reducing plastic waste.
- They promote better soil health by allowing natural integration without the heavy carbon footprint associated with sod transport and production.
Growth and Coverage Expectations
- Outcomes you can anticipate with seed mats:
- Seed mats can provide an even distribution of seeds, which aids in uniform lawn growth.
- They don’t offer the instant lawn look that sod does, so patience is necessary as germination and growth can take several weeks.
Frequently Asked Questions
In this section, you’ll find targeted answers to common inquiries around DIY grass seed mats, offering cost-effective and low-maintenance solutions for a lush lawn.
How do you create a homemade grass seed mat?
To craft a homemade grass seed mat, you’ll need biodegradable materials like burlap or erosion control fabric, grass seed suited to your climate, and organic mulch. Simply sprinkle an even layer of seed between two sheets of your chosen fabric, and secure the edges to prevent shifting.
What are the most cost-effective alternatives to traditional lawns?
Among the most cost-effective alternatives to traditional lawns are:
- Overseeding existing grass to improve density.
- Planting clover or other low-maintenance ground covers.
- Utilizing native plants that require less water and care.
What ground cover options are available for high-traffic areas?
For areas that see a lot of foot traffic, consider these durable ground cover options:
- Artificial turf, which stands up well to wear and requires no mowing.
- Creeping perennials like thyme or Irish moss that are resilient and attractive.
Can DIY grass seed mats be used in areas with pet activity?
Yes, DIY grass seed mats are suitable for pet-friendly areas. Opt for hardy grass varieties that can withstand frequent pet use, and ensure the mat’s materials are non-toxic and firmly secured to prevent ingestion or displacement.
What are the benefits of using grass seed mats over sod?
Grass seed mats have several advantages over sod. These include:
- Lower initial cost and easier transportation.
- The ability to establish a root system that’s more customized to your soil’s conditions.
Are there any low-maintenance no-mow options for residential lawns?
For a low-maintenance, no-mow residential lawn, explore alternatives like:
- Fine fescue blends that thrive in many environments and grow slowly.
- Micro clover blends that rarely need cutting and offer a vibrant green appearance year-round.
Last update on 2024-04-29 / Affiliate links / Images from Amazon Product Advertising API